Management of permission and users
User management
Each user of ESTIMATION should have its own user. This will allow you to manage the permissions of each user individually. Each estimator will also be able to have his or her name associated with the bids he or she creates, and it will be easier to manage each user's activities in the software. The number of users is not limited on ESTIMATION. The number of simultaneous connections is limited by the number of licenses.
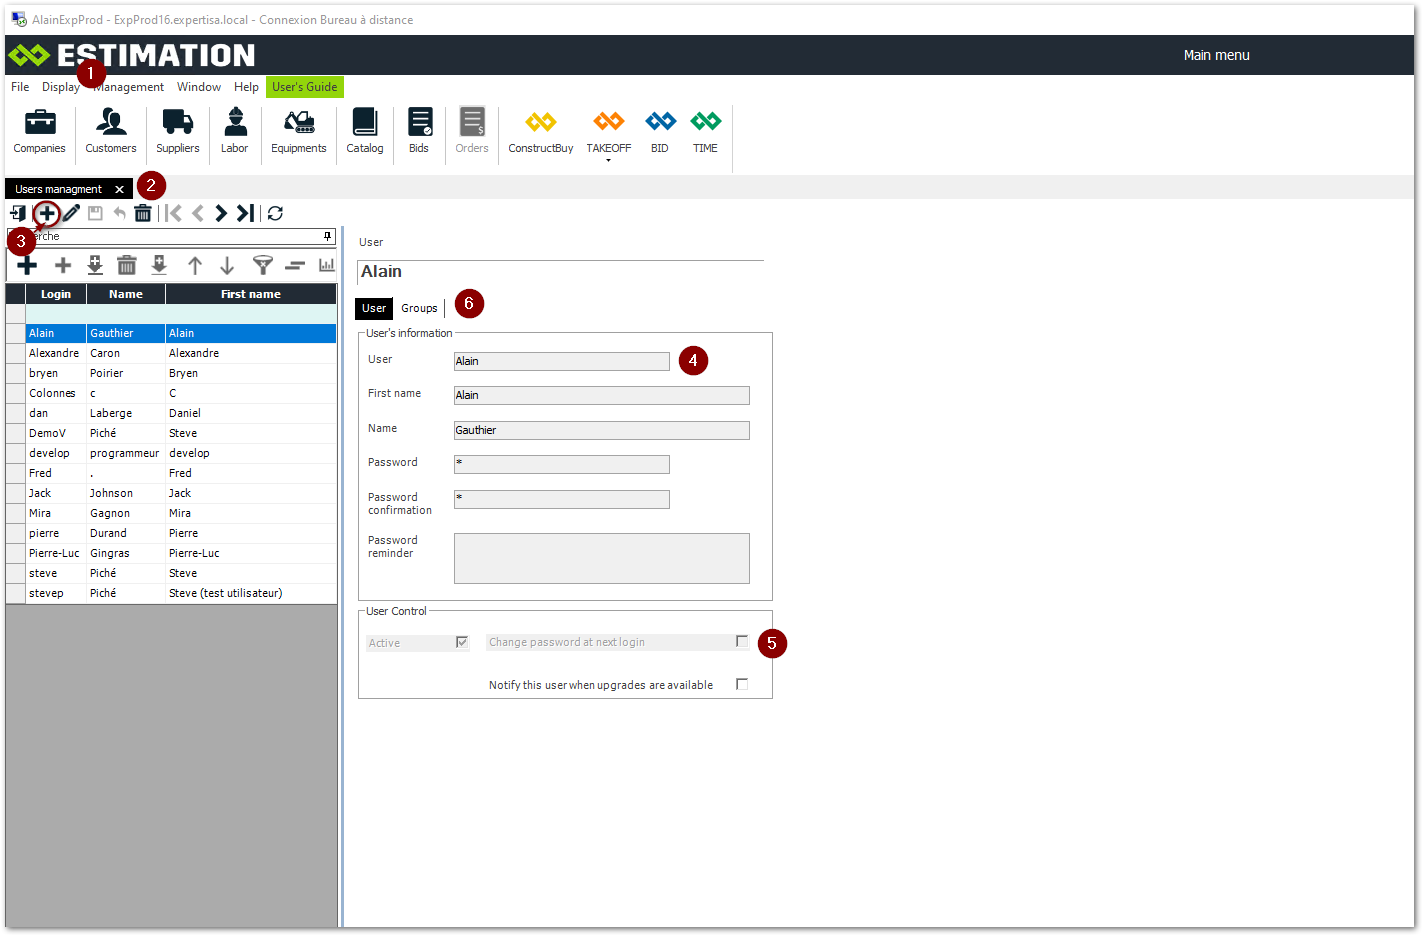
Click on the "Management" menu at the top left
Go to the user management
Click on the "Add" button on the left
In the right section, fill in the fields of the "User" tab
If you set a temporary password, check the box "Change password at next login" so that the user will enter his own password when he logs in for the first time
Go to the "Groups" tab to associate the user to one or more permission groups (see the "User Group Management" section for more details on user groups).
Associate a user with an employee of the company
It is possible to create one or more companies in ESTIMATION, and to associate users with one or more of these companies by creating employees. Only employees of a company can create a bid in their name (as an estimator, salesperson, or other), so by associating your user with an employee of the company, ESTIMATION will automatically associate your name with the bids you create.
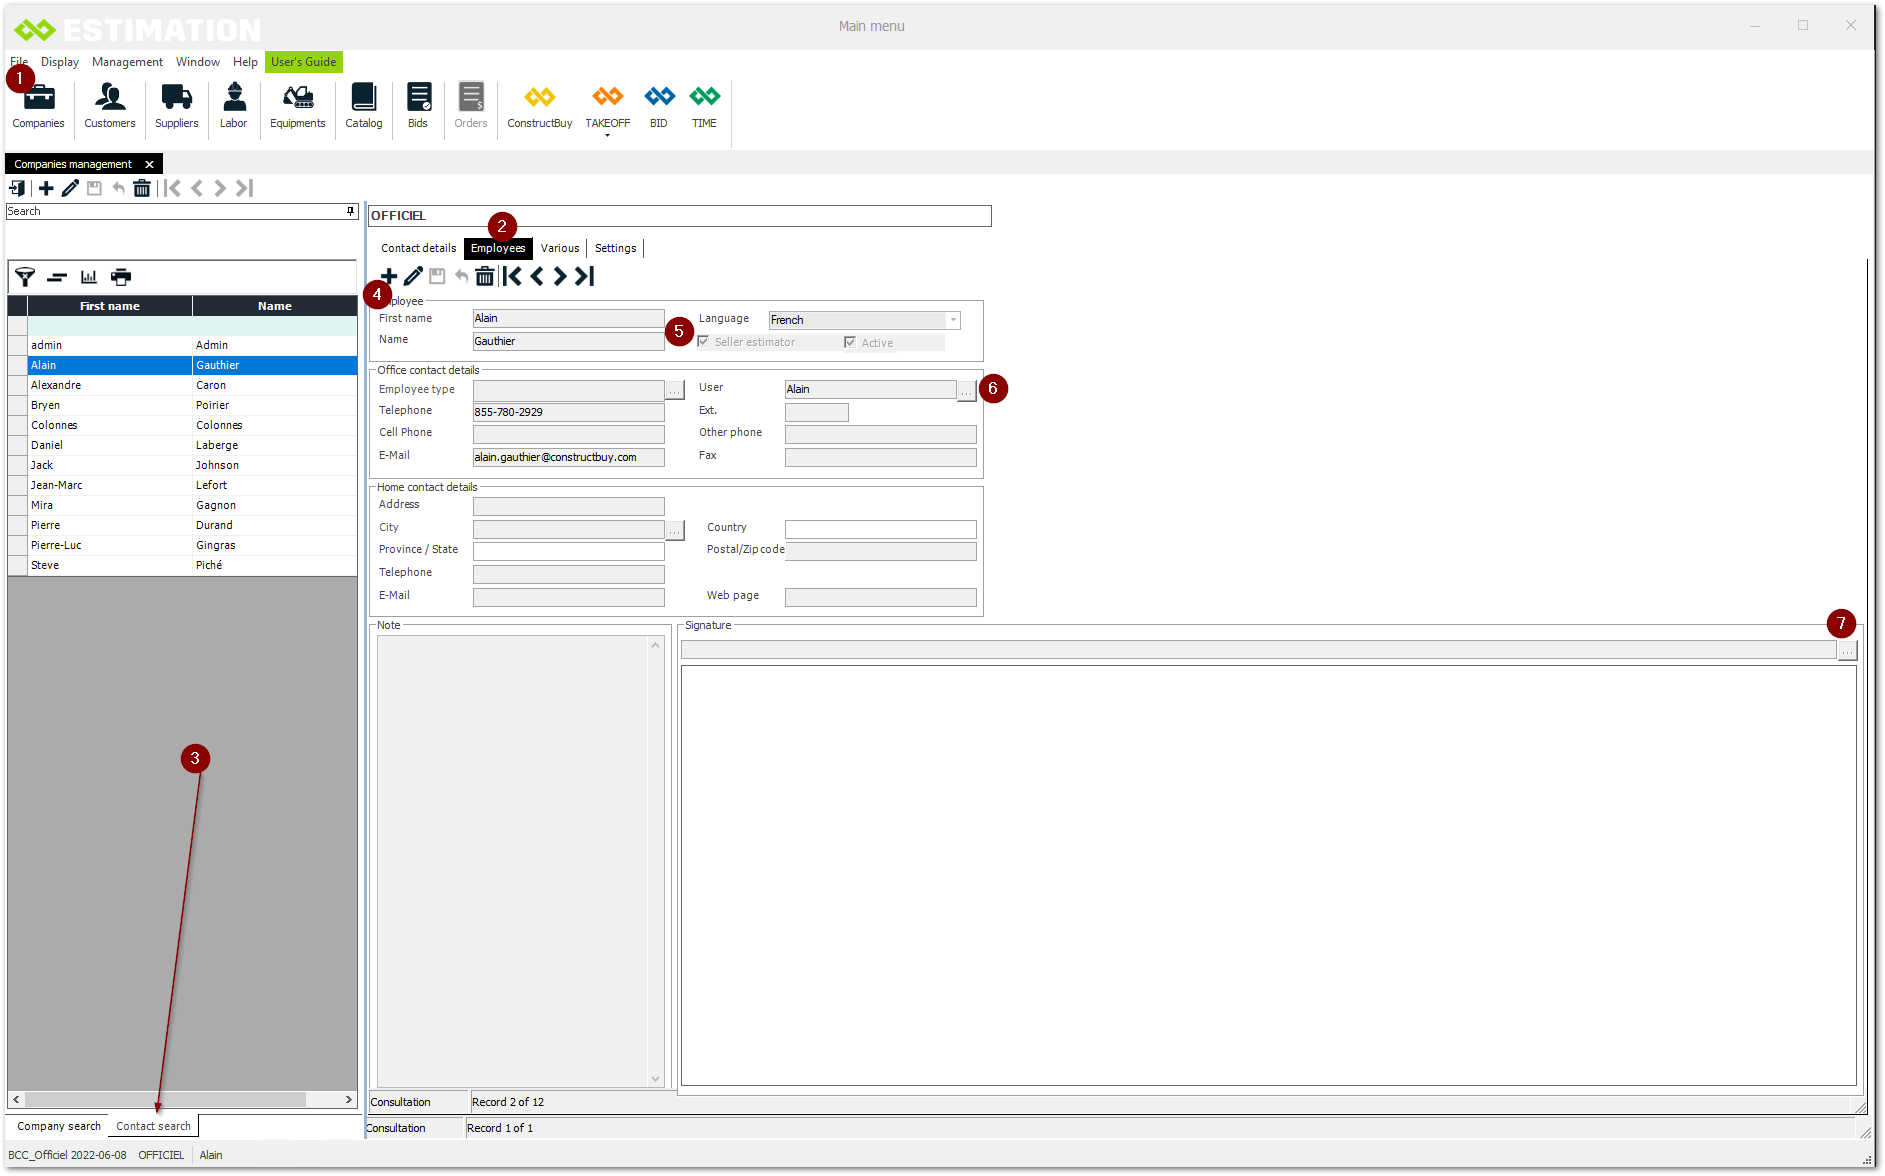
Click on the company management module on the top left
Go to the "Employees" tab in the right section
Click on the "Contact Search" tab to view the list of employees already created
Click on the "+" button to add an employee
Fill in the fields and indicate if the employee is an "Estimator Seller" (this will associate the employee to a bid as an estimator or seller of the bid)
Associate the employee to a user by clicking on the "..." button
Add the signature in .bmp format so that it appears on the customer report
Management of user groups
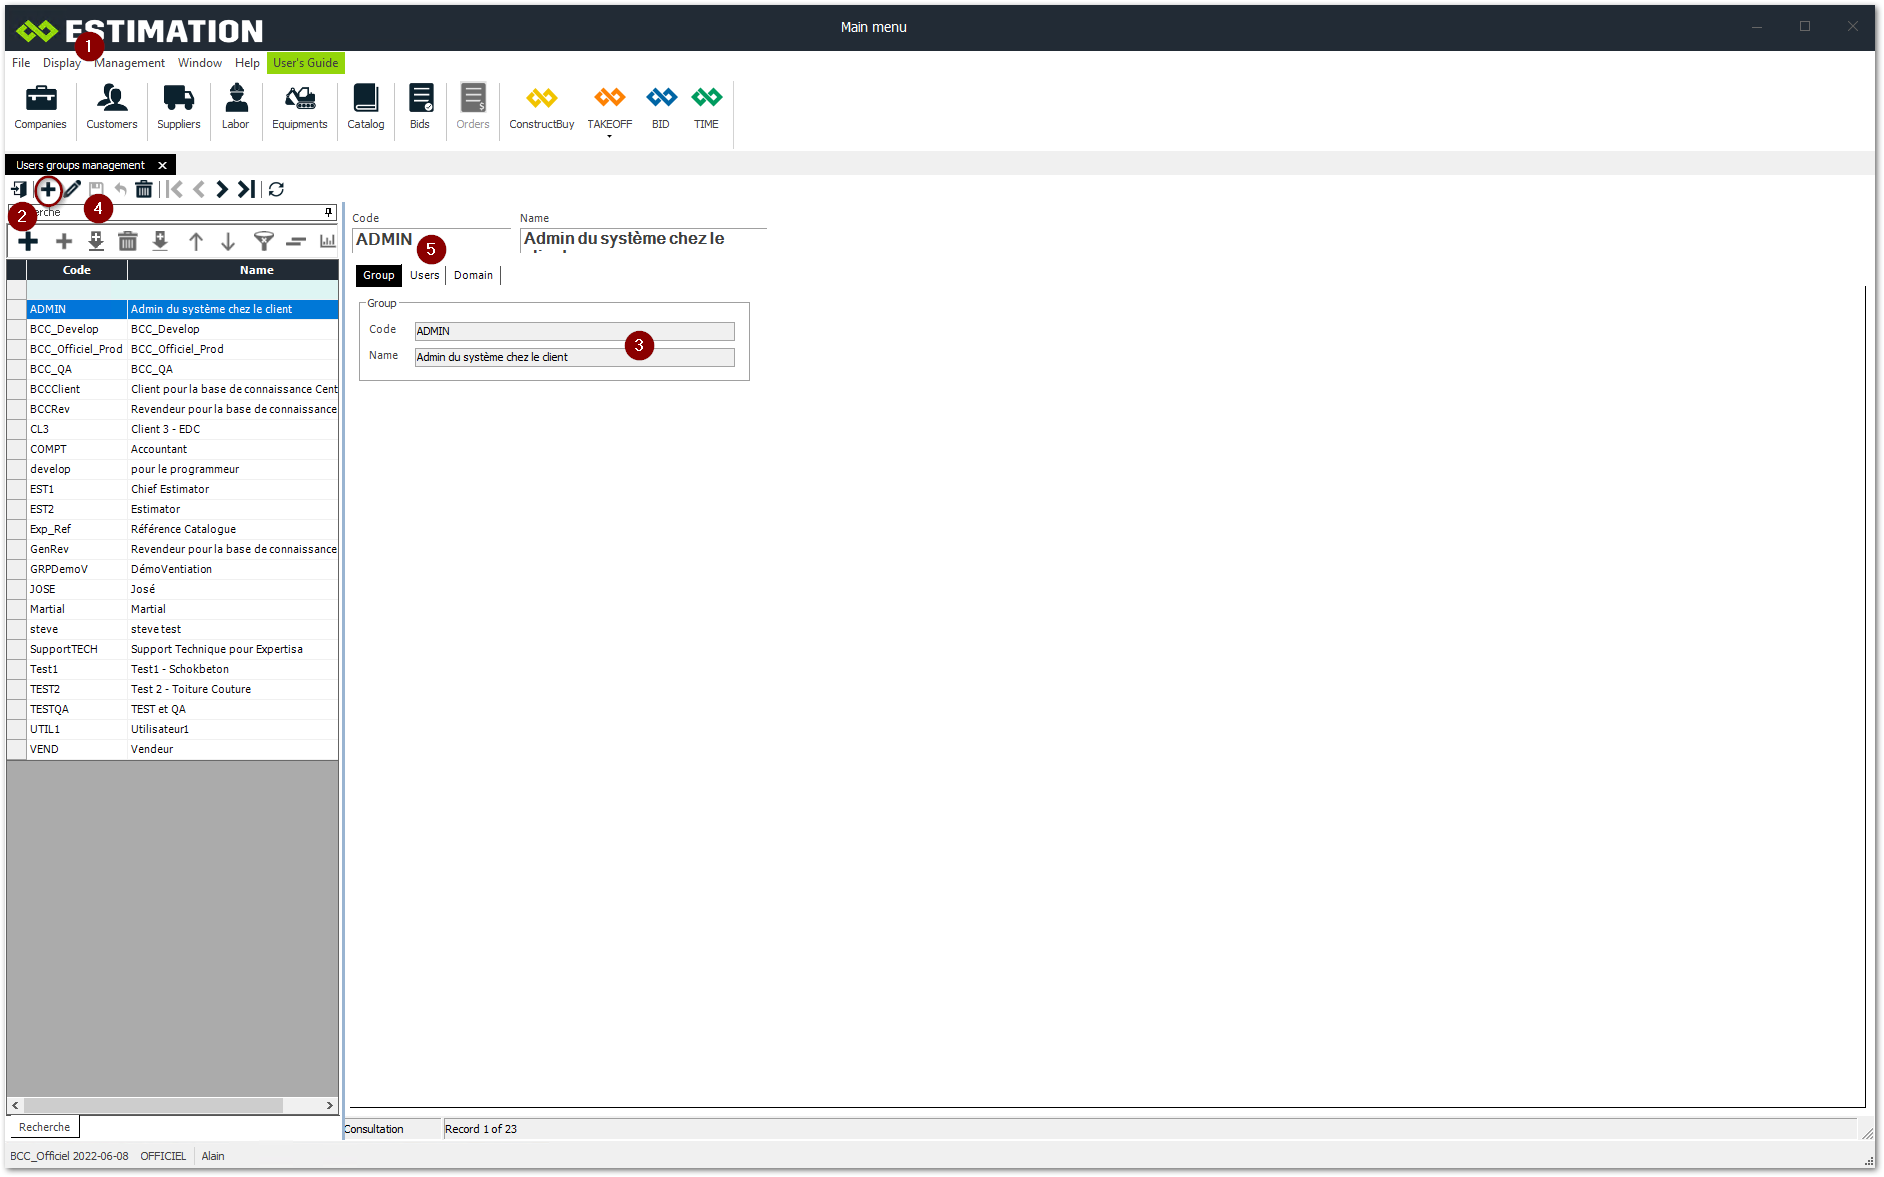
In the Management menu, go to the "User groups" management
Add a group by clicking on the "+" button
Fill in the fields
Click on "Save".
Go to the "Users" tab to add users to this group. (see the section below)
Associating users to a group
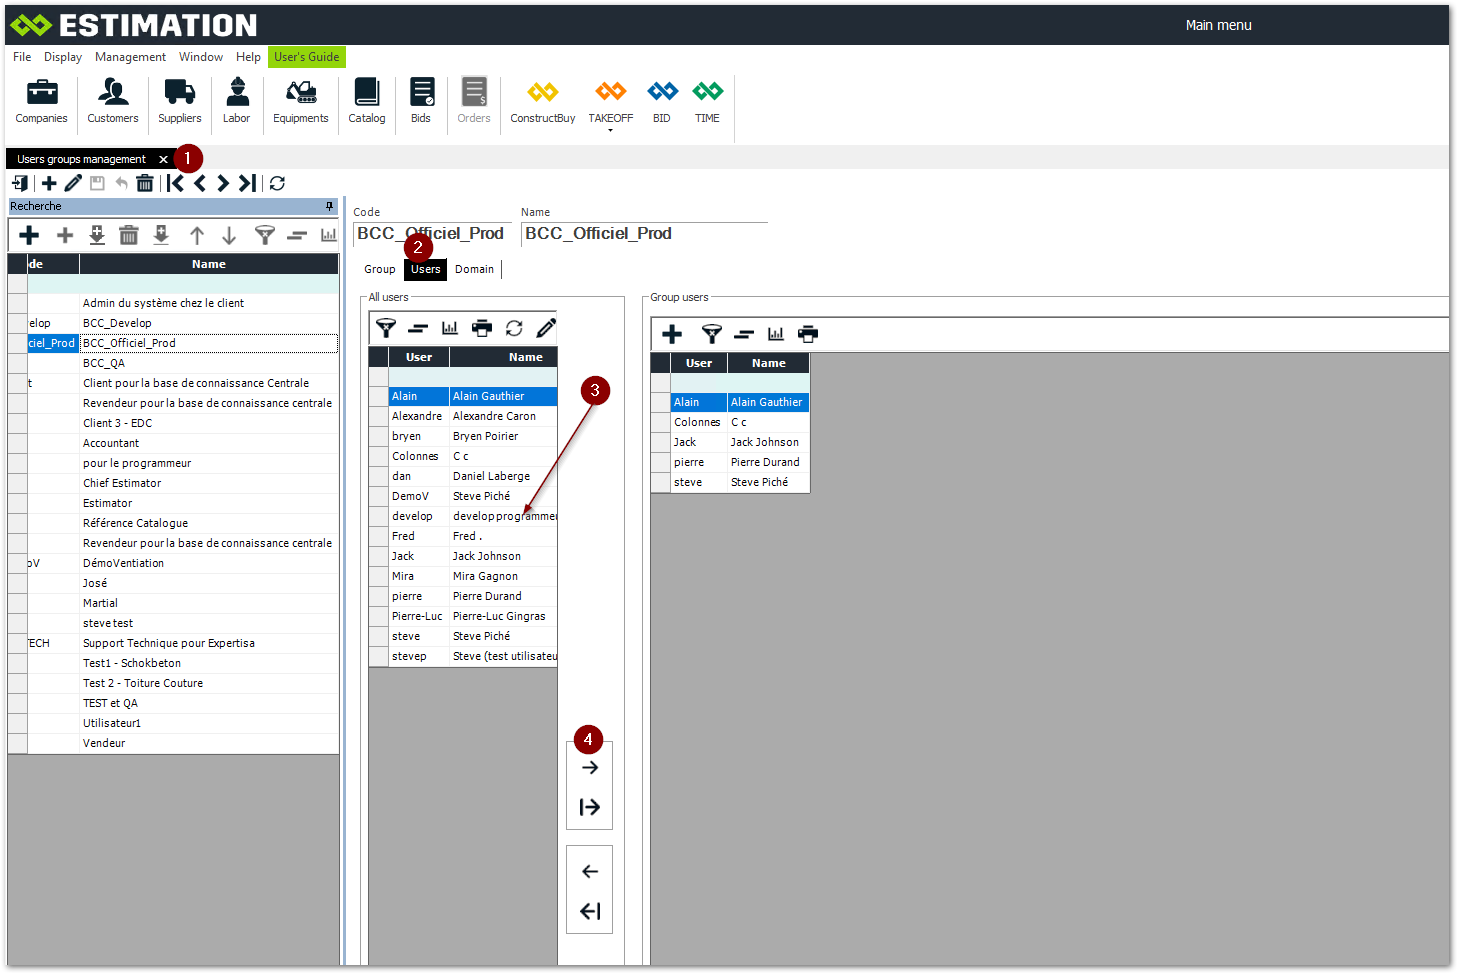
In the user group management
Go to the "Users" tab
Click on the "+" button to display the users of the system
Use these arrows to associate or dissociate users to the group
Associate or disassociate a user group with a domain
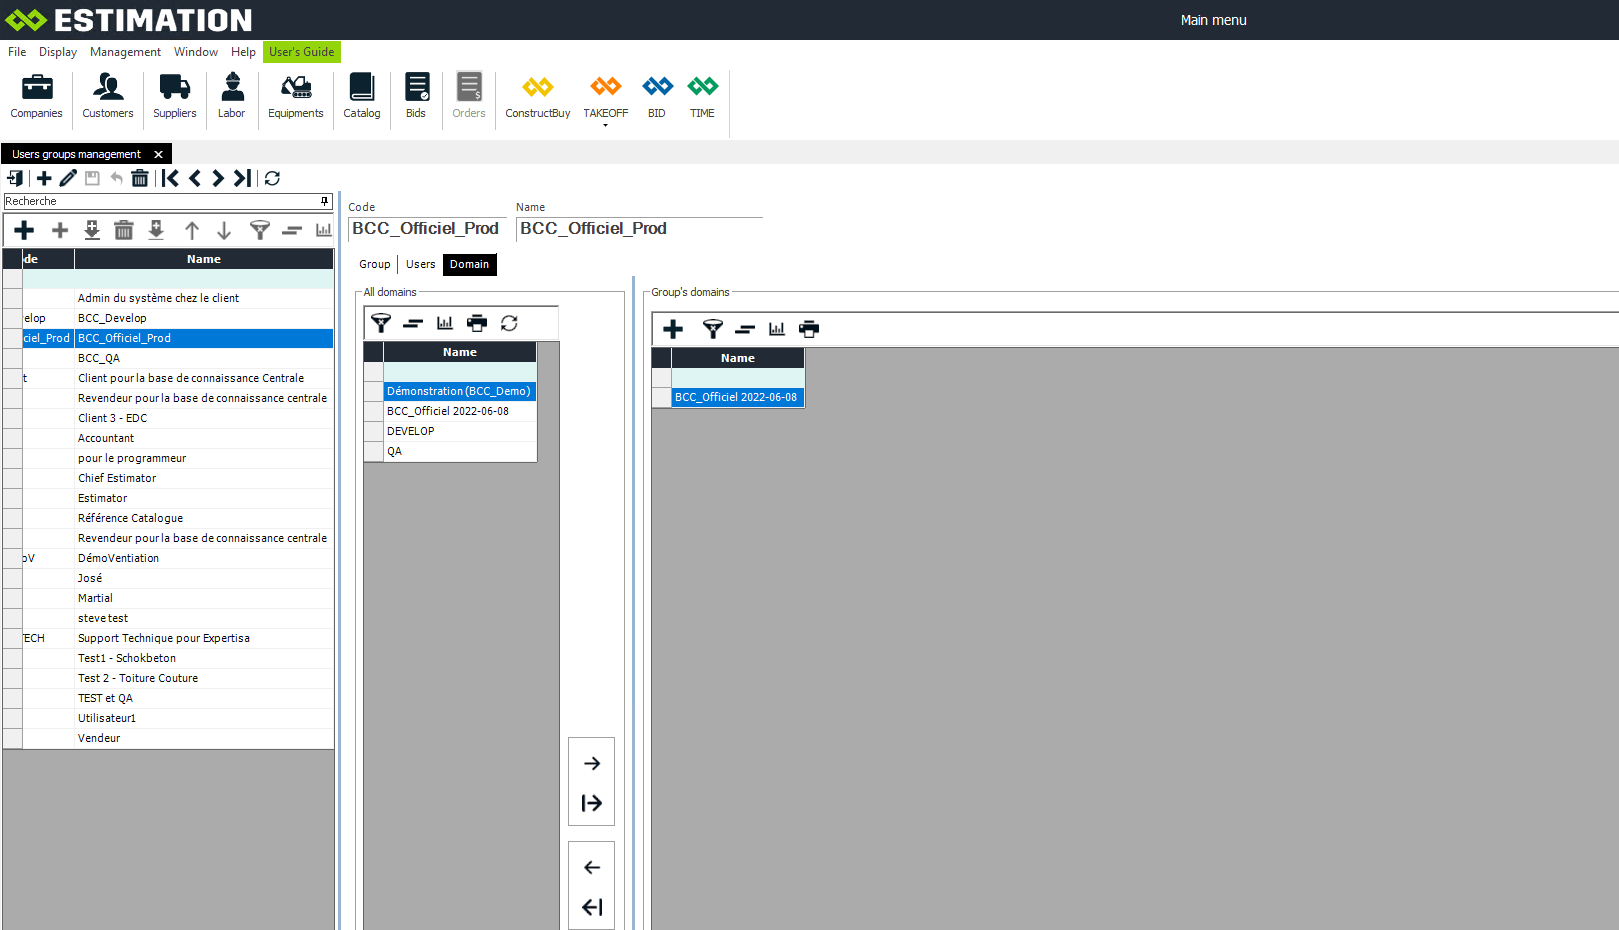
In the user group management
Go to the "Domain" tab to see the domains that are associated with the group
Click on the "+" to display all the domains of the software
Use these arrows to associate or dissociate domains to a group