Annotations, highlights and legends
Annotations
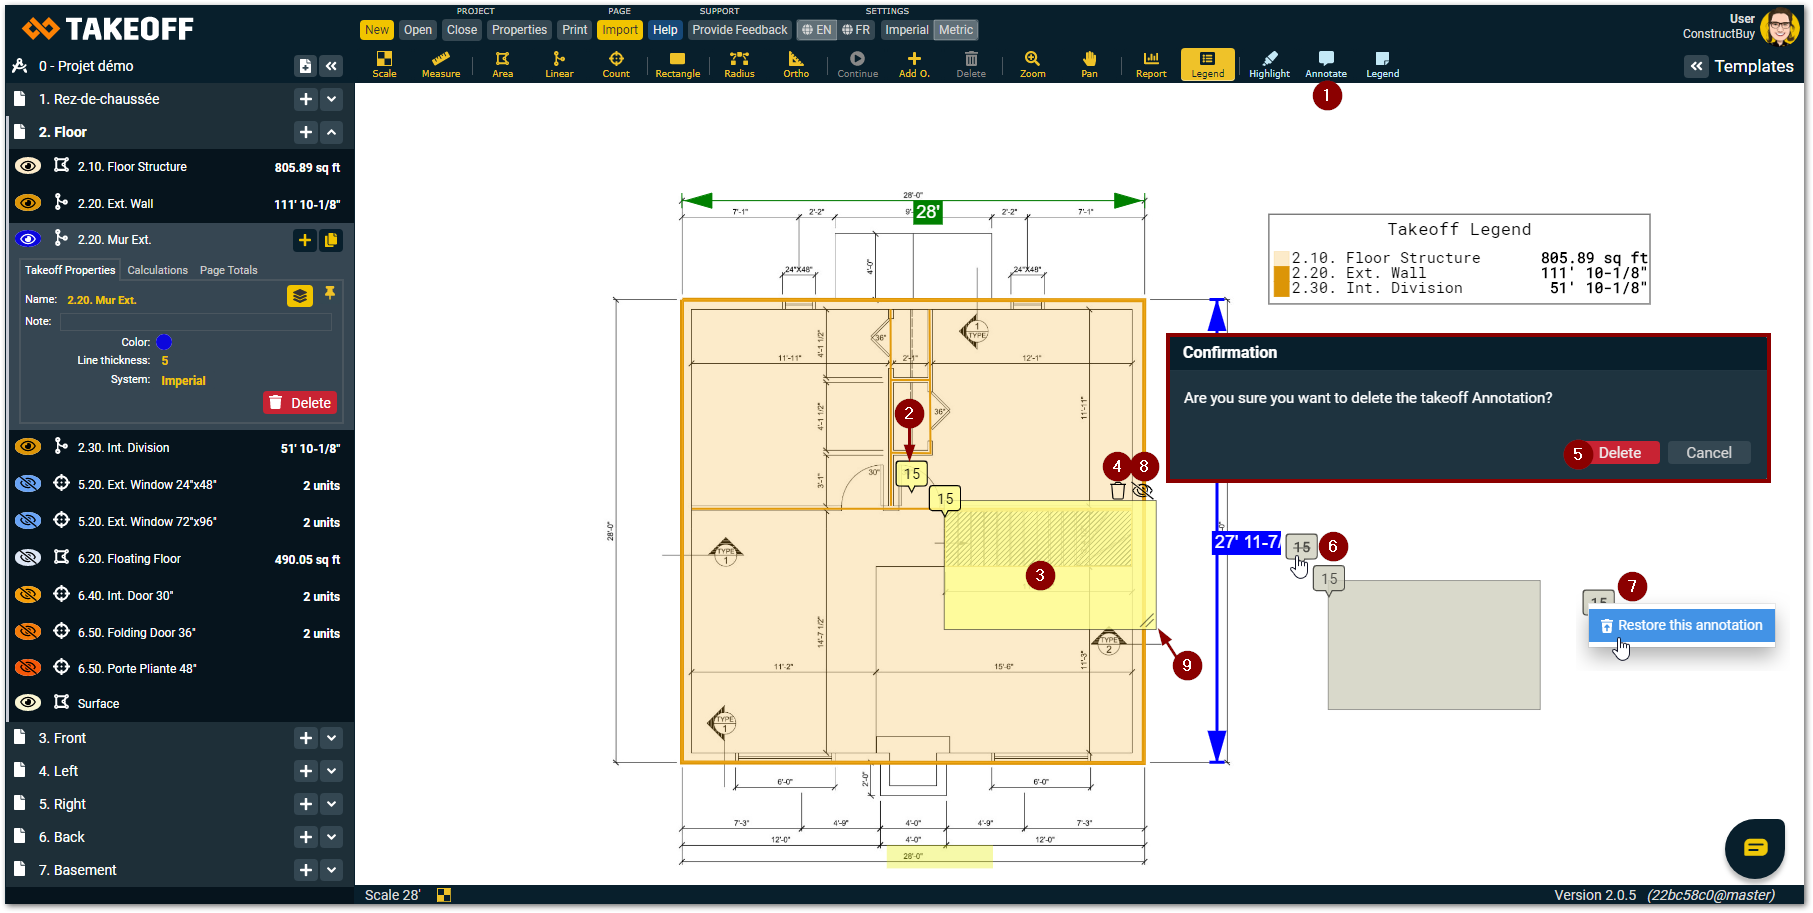
You can insert annotations on your drawings by using the “Annotate” function.

Click on the “Annotate” tool in the toolbar (or press the 6 on your keyboard)
There are two part in an annotation:The pin allows you to point the place where you want the annotation to appear, it can be moved independently to the text area and the number in the pin allows you to easily find the text zone to which it belong
The text zone in which you can write your annotation can also be moved independently from the pin
Click on the trash can icon to delete an annotation
Click on delete in the confirmation window that will appear to confirm your choice to delete the annotation
The annotation won’t completely disappear, it will still be visible but it will turn gray and the number of the pin will be scratched. When you pass your mouse over the pin you will see the text zone that belong to it appear
You can also restore an annotation that has been deleted by making a right click with your mouse on the pin of the deleted annotation
The “Eye” icon allows you to make the text zone part of your annotation disappear on your plan, to make it appear again, you just need to click on the corresponding pin
Use the right inferior corner of the text zone to change the dimension of your annotation’s text zone
Highlights
You can highlight some parts of your plan by using the highlight function.

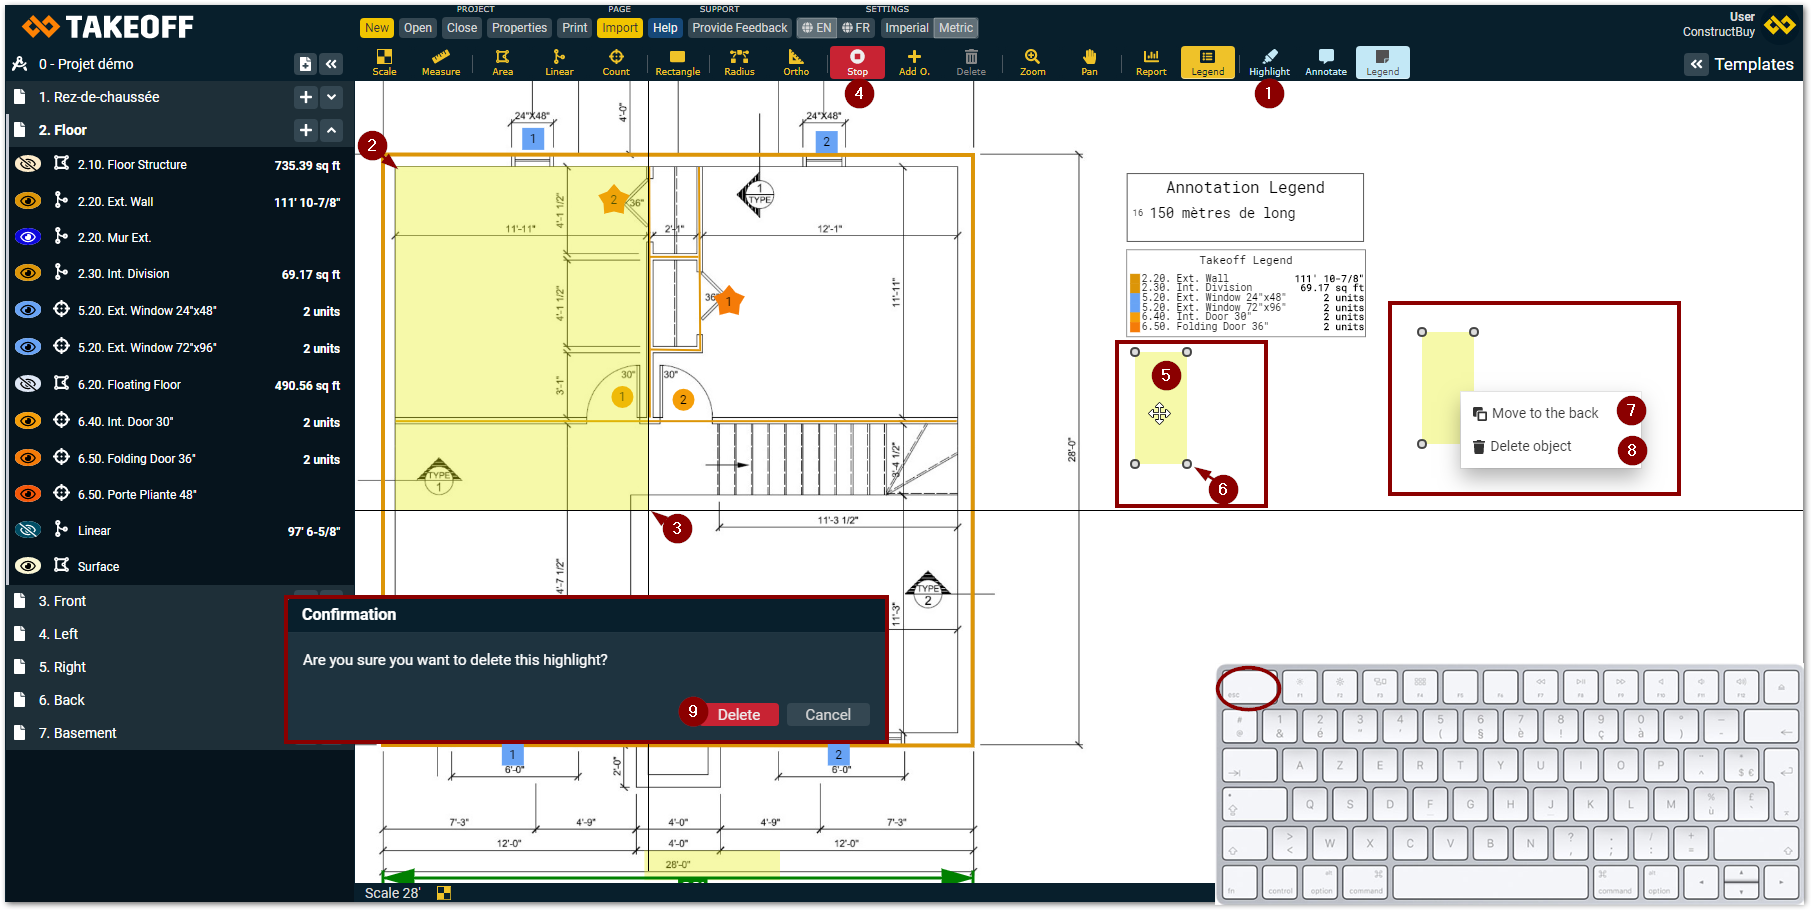
Click on the “Highlight” tool in the toolbar (or press 5 on your keyboard)
Click on the space you want to highlight
Click another time on your plan when you are satisfied with the highlight you made
Then click on the red stop button at the top of the screen or press Escape on your keyboard when you are done with the highlight tool
An highlighted zone can be moved around on your plan by clicking on it and dragging it to where you want it to be
Change the size of your highlighted space by moving the one of the corner to the exterior or the interior of the form
Make sure that you can always see your takeoffs in the highlighted zones of your plan by making a right click on your highlighted zone and by choosing “Move to the back”
There is also a way to delete an highlighted zone:
Make a right click on the highlighted zone and click on “Delete object”
Then click on the «Delete button to confirm your choice in the window that appears
Legends
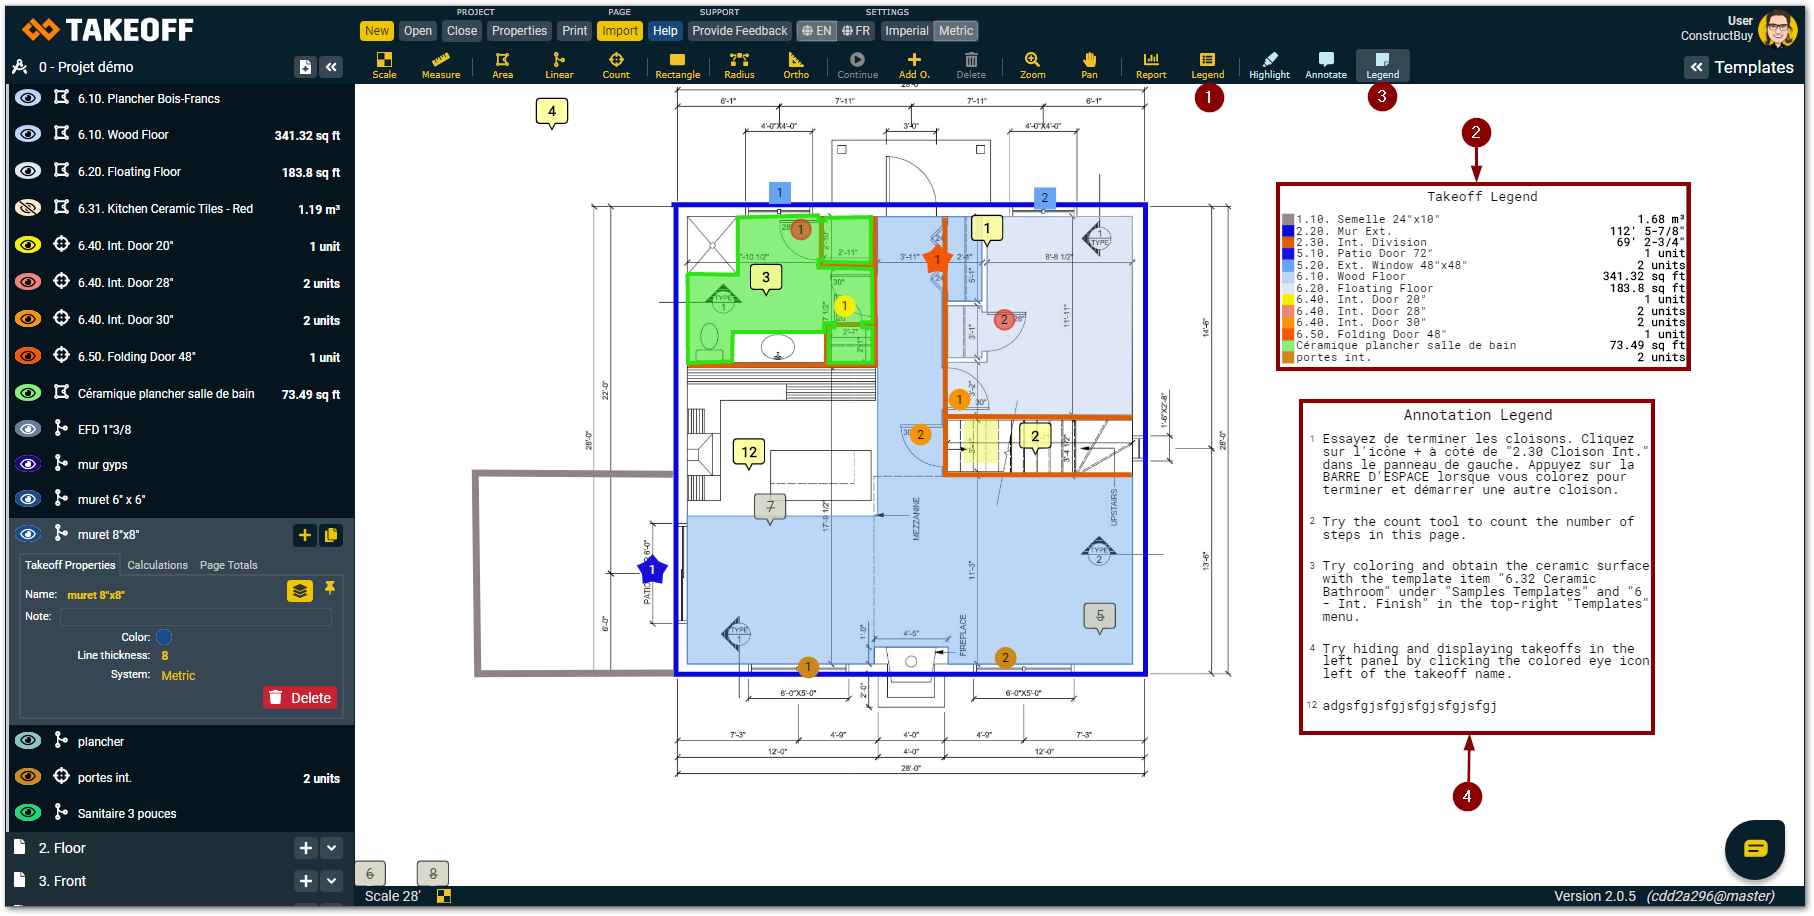
You can make appear two types of legend on the same plan page.

Click on the “Takeoff legend” tool in the toolbar at the top of the screen
The takeoff of the page you are on will all appear in the takeoff legend, you can move it anywhere you wish on the page by clicking and maintaining your click until the legend is where you want it to be
Click on the “Annotation legend“ tool in the toolbar at the top of the screen
The annotation legend will appear on the page of the project you are on, you can then move it anywhere you wish on the page by clicking and maintaining your click until the legend is where you want it to be